This will be a fast guide to get you up and running. Sometimes thats all you need to get the idea of how the pedal controller works and how powerful it is. I know this method works on the LF+ Mini and the LF+ 12+ style midi controllers.
Start with the Axe Fx and Preset
- The Axe Fx doesn’t need anything to be set up besides your own presets. Out of the box it will accept midi commands. Make a note of what midi channel the axe fx is set to. You will need this later.
- I suggest using Scenes on the Axe Fx preset when setting up a preset for live use. Set up a good preset with Scenes 1-8 being different combinations of effects on, effects off, changing X/Y states, etc. I have found that I like to move the first 30 presets to the end of the preset list and use these first 30 for my own personal presets. If you don’t know what “Scenes” are, then look them up. They are basically different combinations of activated blocks on the Axe Fx preset you create.
Now Set Up the FAMC
- Download the FAMC drivers and the edit software and install them. Make sure your Mini is connected correctly to the Axe Fx and it has 9v power. Connect the Mini to your computer with USB, and start the edit software. This software should say “connected” and it should read in all the settings from the pedal. This takes about 10 seconds or so. If you are here then proceed to step 2. If not, you need to check connections, re-install drivers, or software.
- I suggest setting up 1 button to activate each Axe Fx Scene. This will give you a primer in how this thing works and you can dive deeper later.
Main Settings
Under Settings tab, set up the Main Global Settings – In this window under Midi Device Configuration name the first slot Axe Fx and set the “send” column to “on” for this one. It should turn green.
Set up the buttons and their positions, etc.
Set up your pedals in this order… AI Slots, Pages, then Presets.
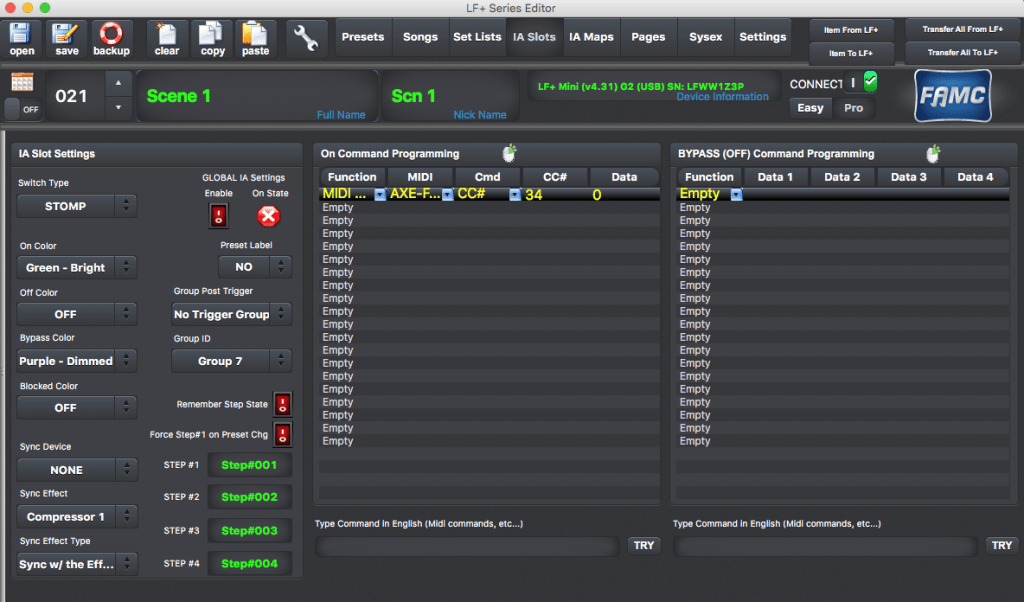
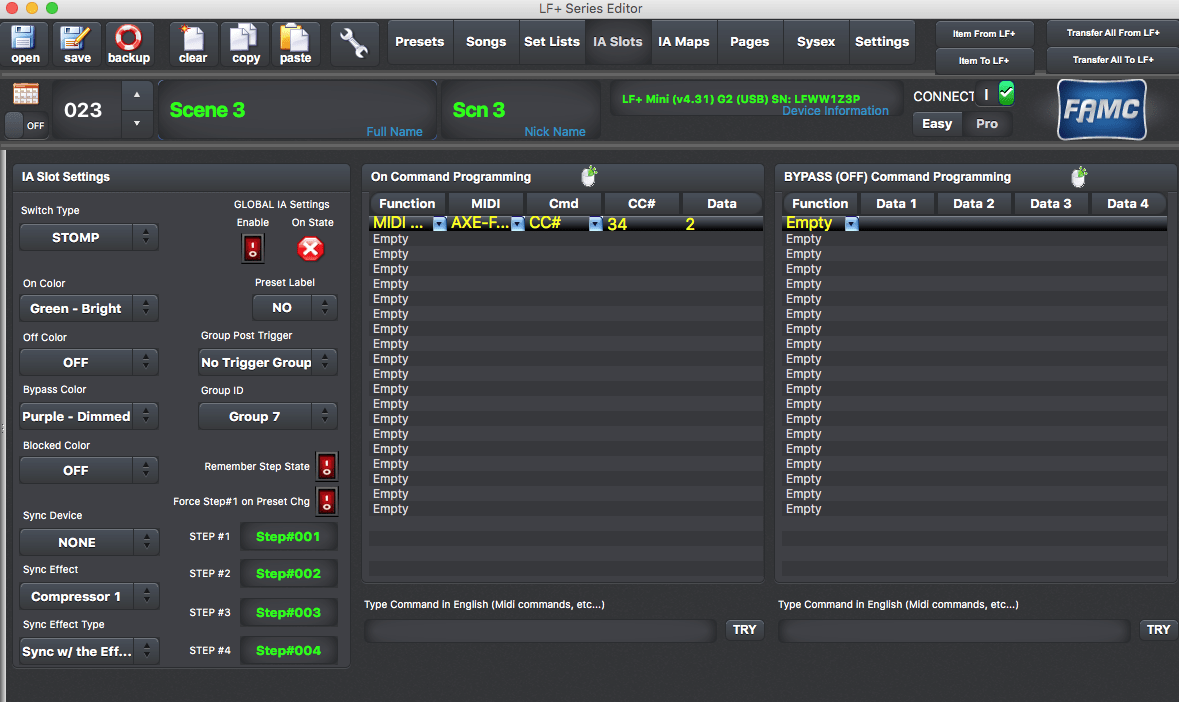
- IA Slots (sometimes called a AI Switch or button) – Set up your first IA Slot to send a Midi command to activate Scene 1. (See my attachment) Follow suit to set up seven more each for the scenes. The only difference will be the data number will go up by one. The IA slot number will not matter, only the command you send and you want to name them something that makes sense including the nickname like “Phaser 1” when activating a Scene with Phaser on it. Also assign a Group ID to each of these for now. I used 7 but it doesn’t matter as long as all 8 are the same. Once you have all 8, move to Pages.
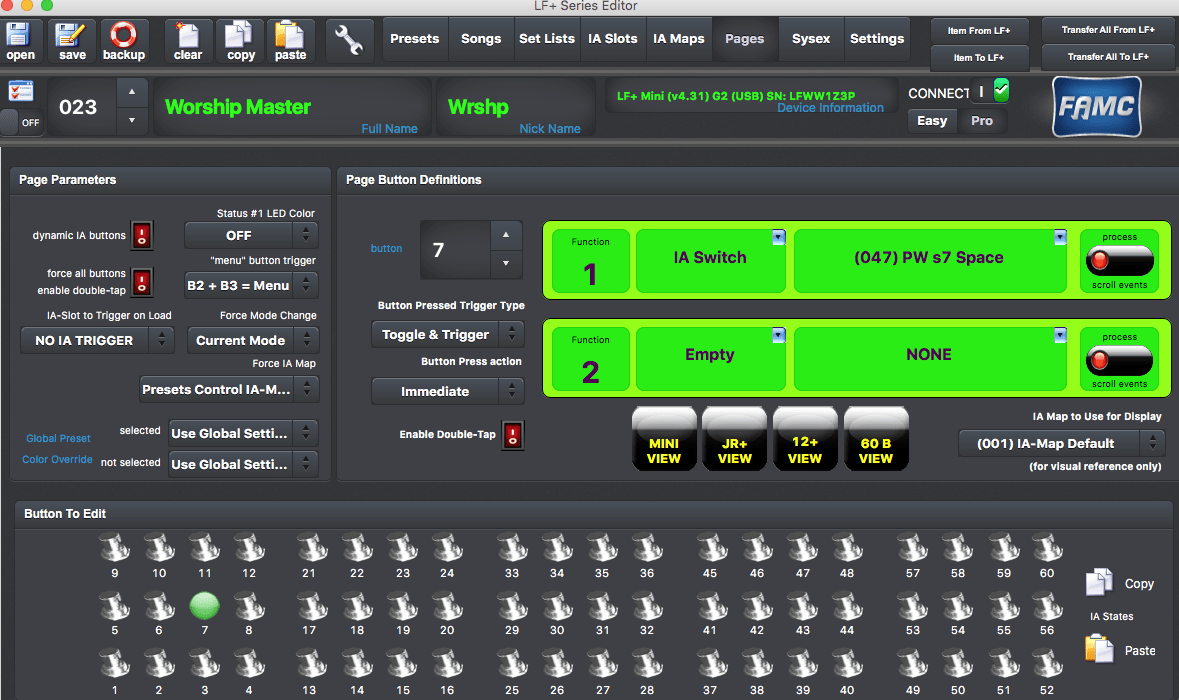
- Pages – this is where you tell what button (IA Slot) to go where on the actual Mini layout. Select the silver button you want to assign (1-8) and in the green area select Function 1 and tell it to be an IA Switch, and in the next column tell it which IA Switch to use. Set up buttons 1-8 on this screen.
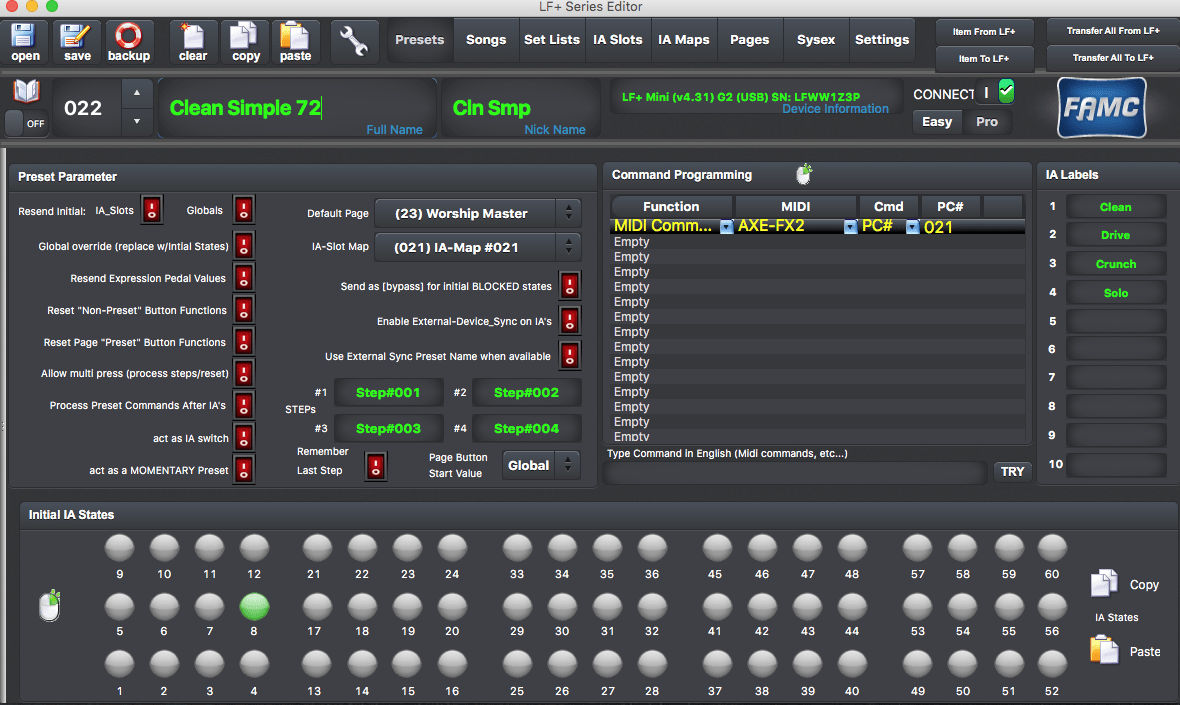
- Preset – Use the preset number that corresponds to the preset on your Axe Fx. So if you want to control the Axe Preset 19, then us the FAMC Preset 19. You can name this and this is the main name that comes up on the Mini. Assign the Default Page to the same page you programmed in the previous step. Now Transfer All to LF+ to send the information to the Mini. It will take 10 seconds or so.
Once it is complete, you can Exit the Editor Mode of the pedal and test out your settings. I wouldn’t suggest trying to program these pedals without the LF+ Edit Software. Good luck!